Office

Setting up Rules in Outlook Desktop

Getting flooded with messages that you don’t want and all have a common theme (from the same person, the same subject, etc.)? Outlook enables you to set up a rule to clean it all up in one fell swoop.

  • Right-click one of the messages.
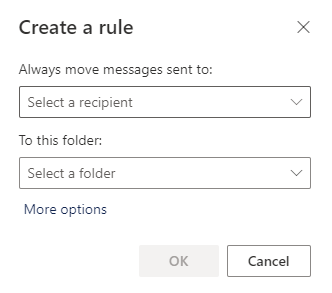
  • Select Rules and then Create Rules.
  • Click Advanced Options in the dialog box that pops up. The advanced options will give you more control with your rule than just the few options first presented.
  • Choose a condition, such as the subject containing certain text. (Since you right-clicked a specific message, the sender and subject should appear in the options from which you’ll choose.)
  • Click the Next button.
  • Choose what you want to do with the message, such as delete it. (If you just want to file the messages away and read them at a later time, choose to move the message into a folder.) Click the Next button to continue.
  • Add any exceptions (although this is rare).
  • Specify a name for the rule. This takes the theory that you may have several rules as time goes by and naming a rule with something obvious means you won’t need to go into the rule details to determine why you created it in the first place.
  • Click the Run this rule now on messages already in the inbox checkbox. This is crucial for cleanup when you have been plagued by a lot of messages for which you are writing a rule.

Enabling Visio to Open FRS Stencils (Shapes)

Visio 2013, be default, will block the FRS Stencils/Shapes (which include gas, electric, connections, north arrow and more) since they were created in much older versions of the program. Follow these steps to tell Visio they are acceptable files to open. (Note: This must be done within the profile of anyone who logs in to use Visio for mapping, not just once per computer.)

  • Run Visio.
  • Click Blank Drawing and click the Create button.
  • Access the File tab and click Options at the bottom of the left-hand navigation.
  • Click Trust Center at the bottom of the left-hand navigation on the pop-up window.
  • Click the Trust Center Settings button on the right side of the pop-up window.
  • Click File Block Settings on the left side navigation.
  • Uncheck the boxes for all three rows. (A checked box means Visio should block it, not unblock it.)
  • Click the two OK buttons.

Stopping Your Visio Map from Expanding into a New Page

Like other Microsoft software, Visio likes to help sometimes and it may differ from your undersanding of the word. One common way of helping is to create new pages automatically for you if you get too close to the margins.

As map makers, you want your drawings to be close to the margins but without making new pages.

To turn this feature off:

  • Switch the Design tab.
  • Find the Auto Size button on the left side of the ribbon.
  • Click the button. It is a toggle, so it will turn back on if you prefer it to be enabled.

    Auto Size button

Changing Outlook 365’s Reply Default Setting

With the recent (Fall 2015) changes to Outlook 365, the Reply button defaults to Reply to All, frustrating many and generally promoting bad netiquette. Here’s how to change the default:

  • Log into Outlook 365.
  • Note the default reply option on your O365 toolbar.

    Reply Drop Down Arrow
    (Note, if you wanted to keep things as they are but just choose alternatives based on the e-mail message, simply click the drop-down arrow).

  • Find and click the Settings icon in the upper right-hand corner.

    Settings Cog 

  • Select Options.
  • Choose Reply Settings.
  • Change the default setting from Reply All to Reply instead and save.

    Reply Setting

Marking a Message as Not Clutter

If you would like to keep a message from being marked as clutter in Outlook, either right click on the message and choose Mark as not clutter or just drag it to the Inbox. If Office 365 is missing messages you want marked as clutter, right click and choose Mark as clutter or drag it to the Clutter folder.

If you are using Outlook 2007, 2010 or 2013 (Desktop), simply drag a message to the Clutter folder to mark it as clutter or drag it to the Inbox to mark it not clutter.

By dragging messages to the Clutter folder you will train the tool to spot similar e-mail in the future. The tool gets smarter over time, learning from your prior actions with similar messages.

Printing the Battalion Line-Up from the DOC Log

Want to print the exported spreadsheet from the battalion line-up module of the DOC Log? The spreadsheet doesn’t work very well with default settings and so you’ll need to tweak a few things. Try this:

  • Click the Page Layout tab at the top of the screen.
  • Click on Margins (in the Page Setup section).  At the bottom of the menu that appears, choose Custom Margins.
    Custom Margins Option in Ribbon
  • Change the settings to:  Left: 0, Right: 0, Top: .5 and Bottom: .5
  • In that same window, click Center on Page Horizontally.

    Excel Margins for DOC Log Line-Up

  • Click the OK button.
  • While still in Page Layout tab, set Width to 1 page  and set Height to 1 page (in the Scale to Fit section).

    Custom Width and Height

  • Click the View tab.
  • Select Page Break Preview (toward the left side of the ribbon).  If a dialog box appears, click Do Not Show Again and then OK.
  • You will see a blue margin line on the far right side of the document.  Drag that blue line to the left, all the way to the edge of the document where the blue shaded text box ends.
  • Execute the Print command.

Note: To return to the previous view so that you do not see Page 1 written across the spreadsheet, select Normal, which is located next to Page Break Preview on the Page Layout tab.

Once you successfully print the first one, to print the additional battalions for your road pack, follow a similar process:

  • Click the Page Layout tab and click Margins.
  • Select Last Custom Setting (the first item in the list).
  • Set Width to 1 page and Height each to 1 page while still in Page Layout, as you did earlier (above).
  • Click the View tab and select Page Break Preview . You will see a blue margin line on the far right side of the document.  Drag that blue line to the left, all the way to the edge of the document where the blue shaded text box ends.
  • Execute the Print command.

Setting up Rules in Outlook 365

  • Log into Outlook and find a message for which you would like to create a rule.
  • Right-click the message in your inbox and select Create Rule from the pop-up list.

    Create Rule


  • Note the pop-up dialog box with basic options and choose More Options.

    Create Rule dialog box


  • Fill in your options for the boxes.

    Outlook Rule Options


  • Step 1: Name your rule. As you may create more rules over time, it is good to name this rule as something obvious to you so that you know what it does when you see it later.
  • Step 2: Add a condition. For the COVID e-mail reply-all mess that occurred on 03/26/2020, I recommend choosing Subject Includes from the drop-down list and then adding the words Working from home under COVID, as that was the subject used in most of the messages.
  • Step 3: Add an Action: Choose Delete. Feel free to add exceptions if you would like.
  • Click the Save button.

    Note: Since there are a considerable number of combinations as to what you might want to do with rules, this TechTip will not offer specifics beyond this point. If you need more assistance after you have experimented with creating your own rule(s), please contact Jeff Feiertag, IT Training Coordinator.

    Also: In the web version of Outlook, this will not delete existing messages. In the desktop version of Outlook, though, you will see a checkbox option to run the rule against the inbox, which would effectively delete the entire thread at once.

Creating a Chart Using Excel: Using the Quick Analysis Button

To Create a Chart in Excel Using the Quick Analysis Button:

  • Choose the data on the Excel worksheet that you want to include in your chart.
  • Choose the Quick Analysis icon.  A dialog box will appear on your screen.
  • Choose Charts option.
  • Preview the different types of charts by moving your  mouse over the various examples.  If you want to see more examples of charts, choose More Charts option.
  • Choose your chart layout from the options and click on it.  The chart will be inserted into your Excel worksheet.