eMEDS Elite

Fixing the “Initializing the Dashboard Resource Cache Manager” Error

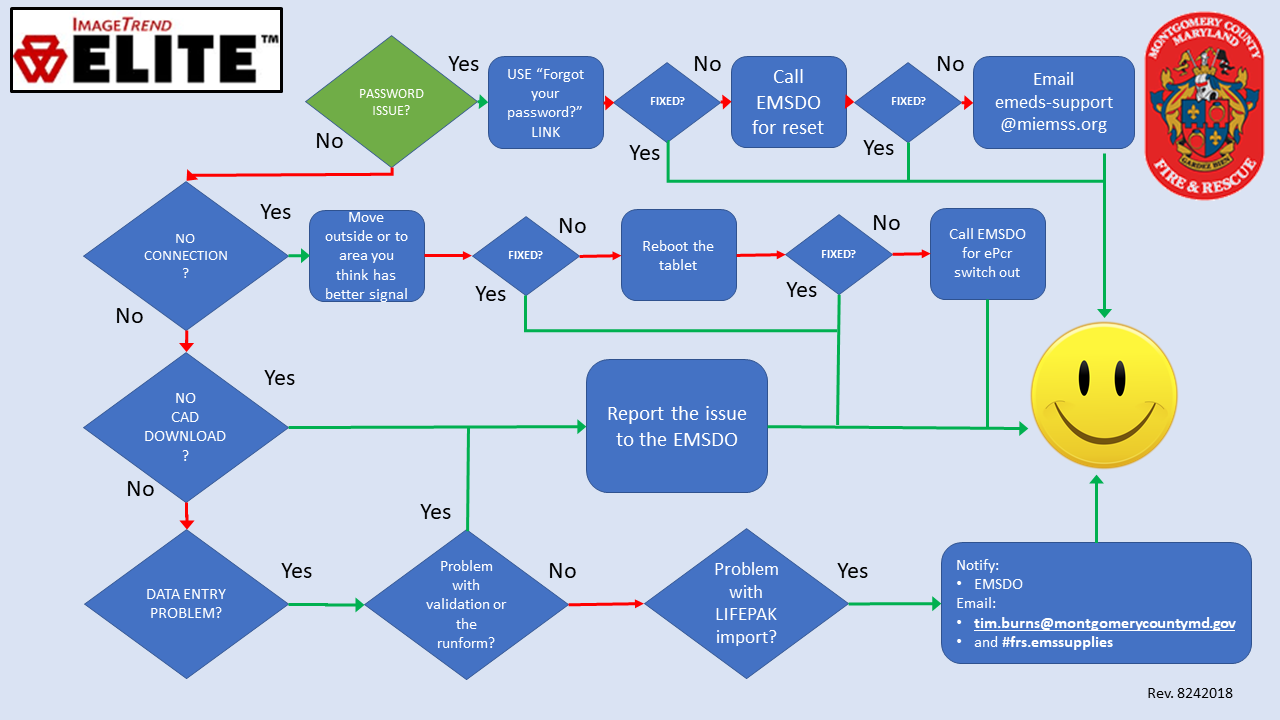
Are you trying to log onto Elite but getting an error of Initializing the Dashboard Resource Cache Manager? Are you frustrated and ready to inflict damage on the unsuspecting hardware?

Please don’t hurt the computer. This is a simple fix in Google Chrome and a quick one, at that.

  • Press Ctrl-H on your keyboard. (This will bring up the browsing data/history.)
  • Find and click Clear Browsing Data link on the left side of the screen.

Clear Browsing Data Link


  • Make sure all of three items are checked (browsing history, cookies and cached images). They should be checked, by default.
  • Click the blue Clear Data button.
  • Ensure that you are in an area likely to get a good wireless connection.
  • Reboot the computer
  • Try logging in again.

Documenting Medication Taken Prior to Arrival

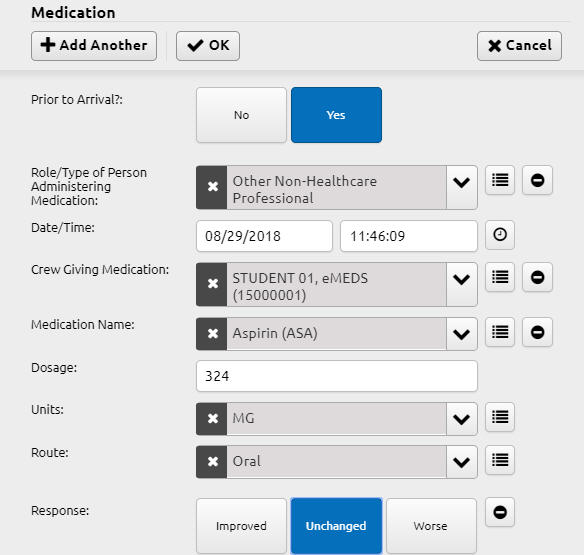
Scenario: Your cardiac patient took aspirin prior to your arrival and you need to document this.

Change to the Provider Actions menu and Medication tab and click the Add button.

Elite Medications Add Buttons


Fill in the necessary files. For the Crew Giving Medication field, use either Other Non-Healthcare Provider (for people unrelated to healthcare organizations) or Other Healthcare Provider (for doctors, nurses, hospital/urgent care personnel, etc).

Form_from_Other_Provider


Identifying a Patient with No Social Security Number

Scenario: You have recorded 999-99-9999 for a patient’s social security number and Elite is flagging you with a red field.

Elite MR Number Validation Rule


What does this mean?

MCFRS now would like you to capture the patient’s medical record (MR) number whenever you transport and you are unable to obtain a valid social security number. The MR number is located on the patient’s wrist ID that hospital staff put on the patient.

Where to enter the MR number?

The CAD menu’s first screen shows the following (now required with the 999-99-9999 SSN) field:

Elite MR Number Needed


Click the Add button.

Select Hospital Medical Record Number – Receiving and input the number found on the patient’s wristband.

Elite MR Number Added


Scanning a Driver’s License for Your Patient Report

This TechTip could make a small part of your documentation easier. Take a minute to let that sink in — the technology provided to you for your job could be making that job a little easier. With Elite, you may scan a driver’s license for your patient report to fill in several Patient Info tab fields automatically.

The fine print: This works successfully with most drivers’ licenses but not every state has been checked.

The process:

  • Go to the Patient menu and the Patient Info tab but do not key in any information.
  • Scroll until you see the Driver’s License Barcode (Android/Win) button and press it:
    DL Scan Button
  • Note the following that appears:
    ID Card Scan Image
  • Press the A3 button on the right side of the tablet screen frame in order to activate the camera on the top of the tablet screen frame.
  • Use the on-board camera on top of the screen to scan the patient’s driver’s license after finding the barcode on the back of the driver’s license. Here is an example:
    Elite Driver's License Barcode
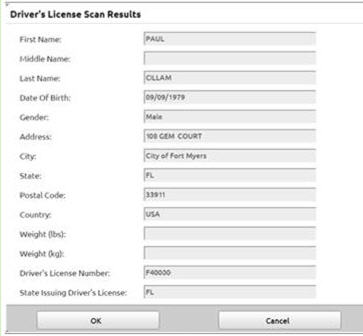
  • Hold the patient’s driver’s license so that the barcode (on the back of the license) makes contact with the red beam. If/when the scan is successful, the camera light will turn off and after a 2-3 second delay, you will see a dialog box with a bunch of form fields filled in (complete with the patient’s information).
    Elite Driver's License Data in Form
  • Click the OK button and verify that the information now appears in the related Elite fields.

Note: Please remember to give the driver’s license back to your patient.

Identifying the Paramedic on a Formerly BLS Call

Scenario: What you thought was a patient with the worst hangnail of his life and a basic BLS call has quickly morphed into a higher-level ALS call. The paramedic arrives onscene and takes over the call. It is important to remember that the patient report should show the paramedic as the primary (and only primary) caregiver.

Why is this necessary? Among other reasons, only paramedics have access to the ALS-related medications and procedures in Elite. Also, if (s)he is listed as the primary caregiver, no one will need to change the provider name in the Crew Member field.

Meanwhile (unlike the original eMEDS), Elite now has a validation rule (#1363) that will flag the Crew Members field (Crew tab) as red if an ALS provider is listed with the crew but not as the primary patient caregiver.

Transferring Your Patient Report to a Non-MCFRS Unit

Scenario: You have begun a patient report and you need to transfer it to a non-MCFRS unit for someone else to complete the report.

Begin your patient report and, when you are ready to transfer it, click the blue Transfers button, located at the top of the screen near the CAD and EKG buttons.
Elite Transfer Report Button


Note the pop-up menu that appears and select Upload Transfer.

Elite Transfer Type Button


Select the appropriate agency (e.g., Frederick County) from the drop-down list and then select which option you need from the resulting pop-up dialog box. Transfer and Remove will send the report to the server for the other unit and remove it from your dashboard, whereas Transfer and Keep will send it to the server but leave the report on your dashboard.

Elite Transfer Options


Note that you will now be prompted whether to Post and Transfer or just Transfer Only. Select the former if you would like to post the report along with the transfer to the server or the latter if you just want to transfer the report to another unit.

Elite Transfer Post Options


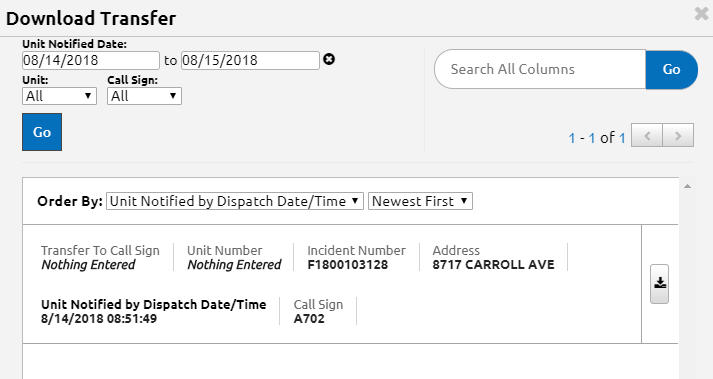
The other unit should click begin a blank incident and then click the Transfer button, followed by Download Transfer and will see the following dialog box:

Elite Transfer Download Dialog Box


The other user may click the download button, found to the right of the desired incident (appearing as a down arrow) and continue the report as needed.

Transferring Your Patient Report from Unit to Unit (within MCFRS)

Scenario: You have begun a patient report and you need to transfer it to another MCFRS unit for someone else to complete the report.

Begin your patient report and, when you are ready to transfer it, click the blue Transfers button, located at the top of the screen near the CAD and EKG buttons.
Elite Transfer Report Button


Note the pop-up menu that appears and select Upload Transfer.

Elite Transfer Type Button


Select Current Agency from the drop-down list and then select which option you need from the resulting pop-up dialog box. Transfer and Remove will send the report to the server for the other unit and remove it from your dashboard, whereas Transfer and Keep will send it to the server but leave the report on your dashboard.

Elite Transfer Options


Your will now be prompted whether to Post and Transfer or just Transfer Only. Select the former if you would like to post the report along with the transfer to the server or the latter if you just want to transfer the report to another unit.

Elite Transfer Post Options


The other unit should click begin a blank incident and then click the Transfer button, followed by Download Transfer and will see the following dialog box:

Elite Transfer Download Dialog Box


The user may click the download button, found to the right of the desired incident (appearing as a down arrow) and continue the report as needed.

Authorizing for HIPAA and Billing for a Patient

Scenario: You have a patient who is not capable of signing his/her patient report.

Referring to your Required Signature Matrix (available as a PDF on the ePCR Toughbook!), you’ll see that you need four signatures and one is from the patient for HIPAA Release and Authorization for Billing.

How can a patient who is not capable of signing actually sign the report, then? (S)he cannot. The signature, then, falls on you to do with the status of Not Signed (Reason). Why does this make sense? Does this mean you are accepting responsibility for billing?

The short answer is no.

The longer answer, courtesy of EMS-Ops, is this: This is all done under implied consent.  The authorization to treat and release for billing can be completed by the provider when the patient cannot offer informed consent, based on the patient’s medical needs.  It is the same authorization we get to do the actual treatment and share patient information with the hospital.

Adding a Second Set of LifePak Data

Scenario: An AFRA does an EKG and a set of vitals on a patient, and then turns the patient over to an ALS transport unit for the transport (and the rest of the patient report) Each set of data from the two LifePaks may be uploaded and then both pay be imported into the same patient report.

  • Import the first data set from MCELITE into the patient report.
  • Import the second data set from MCELITE into the patient report.

The most important part of the that, for the person importing the data, is to look at the name of the LifePak/Unit in MCELITE before downloading.