Best Practices

Choosing Where (and Where Not) to Send Your MFA Code for Office and ePortal

When you go to log into ePortal or Office, are you getting a code for multi-factor authentication (MFA) in too many places? Do you prefer to change where it’s going now?

Go to ePortal (either by direct link or via Quicklinks).

Click the My Account button and log in as directed. (Key in the MFA code you receive.)

My Account Button


Find and click Select Multi-Factor Authentication Options link in the list.

Select MFA Options Link


Key in the MFA code that the system sends you.

Check or uncheck boxes to set your preferences as to where you would like to receive MFA codes from the county and click the Save MFA Options button.

Save MFA Options button


Log out of ePortal when you are finished.

Using a Token or Fob for Multi-Factor Authentication

Have you opted to use a token or fob for multi-factor authentication? Assuming you already have filled out the tech service request (TSR) and have been notified by your battalion chief that it is ready for you, here are the instructions for use.

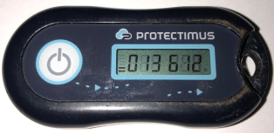
Background: A key fob is a small device that is about two inches in length and an inch wide. The device generates a password, which you will use in place of a text to your cell phone or message to your e-mail account for multi-factor authentication in Montgomery County systems. Remember, this key fob is assigned to you and will not work for anyone else’s account. Likewise, secure it and do not lose it, which would defeat the purpose of needing a second login code to keep others out of your accounts.

MFA Key Fob


Use:

  • Log into ePortal or Office 365. You will be promoted for a code.
  • Press the white button on the left side of the key fob and note the six-digit code that appears.
  • Enter the code into your MFA screen to be granted access.

    (Note: The code will be good for about 30 seconds before a new code is generated and displayed on the screen.)

Setting up your MCGOV E-Mail Account on Your iPhone

iPhone

  • Go to Settings and choose Mail.
  • Click Accounts.
  • Click Add Account.
  • Choose Microsoft Exchange and input your e-mail address where indicated.
  • Add MCGOV as the description and click the Next link (at the top-right corner).
  • Note that a pop-up will appear, asking if you want to configure manually or sign in directly. Choose Sign In.
  • Wait for the screen to verify your account and then you will see the MCG login screen.
  • Change the top line to your username from your email address. Your MCGOV username is your Windows username followed by @montgomerycountymd.gov. (For example, Michael Johnson’s username might be johnsm2@montgomerycountymd.gov.)
  • Input the MFA security code where prompted, which would have just been sent to you and ensure that the box is checked.
  • Click the Verify Code button.
  • Select which facets of Outlook you would like to include (Mail, Contacts, Calendars, Reminders and/or Notes).
  • Click the Save link at the top-right corner.


Troubleshooting MCtime Java/Manager Version

Note: These directions were updated on 03/29/2022.

As Java changes often present MCtime troubleshooting opportunities for managers, here is a guideline for you. Please remember that FRS Technology is always available and happy to help, though. If you would like assistance, please fill out a Tech Service Request (per FCGO 21-02) and select Applications/Software – Web Based for the Nature of Problem (category) field.

The list below is a progressive set of directions and you may need to check MCtime as you go along — what may resolve the issue for one computer may require more steps for another. Also, please remember to use Microsoft Edge. Again, to stress the point, let FRS Technology know if you would like assistance at any time.

Software Center (if there are Java-related items)

  • Locate and run MCG Software Center on your Windows desktop.
  • Install the latest version of Java (JRE) and User Check.

Software Center (if there are not Java-related items)

  • Follow these directions to update Software Center, to show Java-related items. (The directions should open in a new tab. return here when finished.)
  • Wait five minutes.
  • Locate and run MCG Software Center on your Windows desktop.
  • Install the latest version of Java (JRE) and User Check.

Attempt #1: Test MCtime

  • Try to access MCtime and log in. See if you can pull up a timecard to edit successfully. if you cannot, continue down this troubleshooting list.
    Note: If you are telecommuting, ensure that you are connected to the VPN before continuing to troubleshoot with the Software Center.

Deployment Text File

  • Open a Windows folder (either through File Explorer or any folder you have in Windows).
  • Navigate to C:\Users\[your_username]\App Data\Local Low\Sun\JAVA\Deployment\ and delete the deployment text file.

Attempt #2: Test MCtime

  • Try to access MCtime and log in. See if you can pull up a timecard to edit successfully. if you cannot, continue down this troubleshooting list.
    Note: If you are telecommuting, ensure that you are connected to the VPN before continuing to troubleshoot with the Software Center.

Creating a SeamlessDocs Account to Save Forms You Are Completing

If you are filling out forms for the department (and not creating them; that’s different), you may want to create an account in SeamlessDocs so that you may save your place in a form and return to it later. Here are the steps you need to take. We recommend you follow this procedure before starting to fill out a form:

  • Open a form you would like to fill out and submit.
  • Find and click the Save button (located in different places in different browsers, but most often in the lower-left corner of the screen).
    SeamlessDocs Save Button
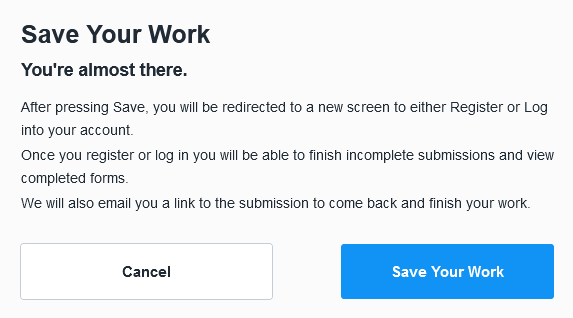
  • Note the alert that pops up, telling you to save your work.
    Save Your Work Dialog Box
  • Click the Save Your Work button.
  • Find the Register Now button and click it to proceed.
    Register Now Button
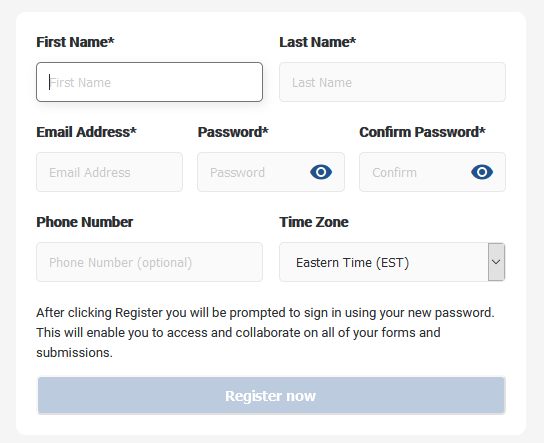
  • Fill in the form with the information requested. Neither Montgomery County Government nor MCFRS will have access to this password.
    SeamlessDocs registration Form 1
  • Click the Register Now button.
  • Open your e-mail and click the yellow button to access your SeamlessDocs account.
  • Log in with the e-mail address as username and the password you just created. Click the Login button.
  • Return to your e-mail account (if prompted, which usually only happens the first time) to verify your SD account. Click the Verify E-Mail button in the e-mail message you receive.
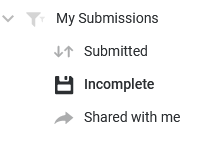
  • Note that SeamlessDocs loads and takes you to a general area, instead of going directly back to the form you were filling out earlier. Find the My Submissions listing on the left side of the screen.
    My Submissions
  • Click the Incomplete link to see which form(s) you have begun but not yet submitted.
  • Double-click the name of the form and fill out your form. Save your work as often as you wish.
  • Remember to log out of SeamlessDocs when you are finished. The Log Out link is found by clicking the File menu at the top-left of the screen.

Setting up a New VPN Connection (County Laptop)

Have you been granted VPN rights, but now you don’t know the first thing to do? Here is your next course of action.

(Note: This presumes you’ll be using a county laptop to connect to the network, but won’t need to connect to a desktop in your office from that laptop.)

Set up Pulse Secure

  • Find and double-click MCG Software Center on your desktop. (This is only on county computers and you will not find this on your home computer.)
    Software Center Icon


  • Find and click to install Pulse Secure Client from the list. Go through the installation.
    Pulse Secure SW Center Icon


  • Run Pulse Secure. We now need to establish a connection (something you’ll do only once, as you will just use that saved connection after this point). The screen should show an empty list of connections and we’ll add one.
  • Click the plus (+) button in the Pulse Secure window to add a connection.
    Pulse Select Connections Header


  • Add the necessary info:
    • Type: (use the default Policy Secure or Pulse Secure).
    • Name: Call this whatever you would like. I recommend MCG or VPN.
    • Server URL: https://secure.montgomerycountymd.gov (unless DTS told you your server is secure2, in which case it would be secure2.montgomerycountymd.gov)
  • Click the Add button.

Connect to the VPN

  • Launch Pulse Secure (if you have not already).
  • Find the saved item for the county VPN and click the Connect button.
    County VPN Connection


  • Input your county single sign-on username and password (i.e., what you use to log into Windows in the office) when prompted and click the Connect button.
  • Wait for the connection to be made successfully. You will know it was successful if you see the green check mark next to the name of the saved connection.VPN Connection Successful


Disconnect from the VPN

  • Click the Disconnect button in the Pulse window when you are finished with county servers and want to disconnect.


Taking a Substitute Holiday

If a county holiday falls on your regular day off, you need to take another day off (using holiday lave, not your annual/sick/comp leave) within the same pay period.

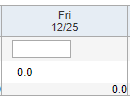
Scenario: Christmas Day (12/25) falls on a Friday and the employee works every other Friday in his normal schedule. 12/25 happens to coincide with that regular day off. The total number of hours in the preloaded MCtime timecard shows zero (0.0) hours on 12/25.

MCtime Date Showing Zero Hours for the Holiday

  • Add a row.
  • Change the Pay Code from Hours Worked to Hol – Holiday Leave.
  • Put in the number of hours for a full work day in the date of your choice (again, it must be in the same pay period). This applies whether you work 8, 9 or 10 hours on your regular schedule.
  • Delete the preloaded number of hours worked for the date you have chosen.
  • Save your timecard.

MCtime Holiday Hours Swapped to Another Day

Do you want to see more? Here is a link for the official documentation on this topic from the county MCtime office.

Adding a Resource Mailbox in Outlook Desktop

Were you recently granted access to a resource mailbox in Outlook? Are you using Outlook Desktop? If both are true, this message is for you.

  • Open Outlook Desktop.
  • Find and right-click your name in the folder list on the left side of the screen.
  • Choose Data File Properties.
  • Click the Advanced button.
  • Click the Advanced tab.
  • Click the Add button.
  • Type the name of your resource mailbox and then click the three successive OK buttons.
  • Find the new mailbox in your folder list. (As an outline, it will be even with your name, but likely pretty far down the pane.)
  • See if you can expand the item (using the > symbol). If you cannot, your rights need to be adjusted at the server level.

Resetting Your FireApp Password

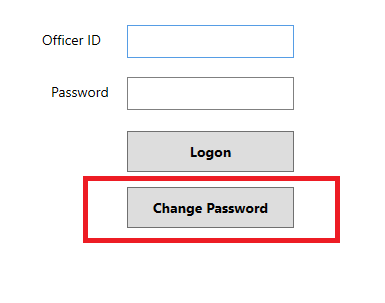
Users may use the Change Password button from the login screen to reset your FireApp password.

  • Input your FDID in the Officer ID field.
  • Click the Change Password button.

FireApp Change Password Button


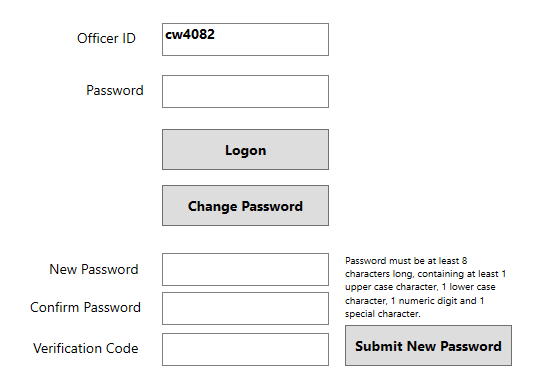
You will then receive a temporary PIN (sent to the e-mail address on file with FireApp). Input the code along with your new password (and confirmation second entry of that password).

FireApp Change Password Screen


Click the Submit New Password button and you’re ready to log into FireApp.