Outlook

Setting Outlook to Launch a New Window for a New Message

Do you want Outlook 365 to give you a new window for each new message you start? You have this ability but the default is to put new messages in the reading pane. Make the change now…

  • Click the gear symbol and choose Options.
  • Click Settings on the left side of the window in the vertical navigation.
  • Find Reading Pane settings on the right side of the screen.
  • Select Type in a New Window.
  • Click the Save button at the bottom of the screen.

Note: To use this feature, you will need to turn your pop-up blocker off for this site if you haven’t already. If the new window is blocked when you click New Mail, simply click the blocker settings at that point and enable for this site.
Finding Mail in Your Folders on Your Phone

Scenario: You set up your e-mail account on your phone, complete with several sub-folders. When you go into those folders on your phone, the folders are empty! (Feel free to insert dramatic background music here in your own mind.)

What happened?!

The phone is set up to sync only a certain date range of mail. The mail you’re hoping to see in folders is probably older than the sync range.

To change this:

  • Access your e-mail account settings on your phone.
  • Find Mail Days to Sync (iPhone) or Days of Mail to Sync (Android).
  • Change to something more fitting to your needs.

Recovering Deleted Items in Outlook 365

Even if you have deleted something in Outlook (e.g., mail, contacts, calendar item…) and even if you have emptied your Deleted Items folder, you may still be able to recover something that would otherwise be gone.

  • Find and right-click the Deleted Items folder on the left side of the screen.
  • Choose Recover Deleted Items.
  • Click once on the item you would like to recover.
    • Use the search box at the top of the window to track down what you are trying to recover if you don’t see it immediately.
    • Click the check-box to the left of each item you would like to recover if there are multiple items to retrieve at once.
  • Click the Recover link at the bottom-right corner of the pop-up window.
  • Click the OK button on the new pop-up that explains where your item(s) will go.
  • Close the window.

Adding the Apparatus Calendar to Outlook 2007

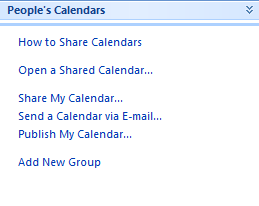
  • Switch to the calendar view.
  • Find and click the link to Open a Shared Calendar.

    Outlook 2007 - Calendar Other

  • Note the popup window that requests the name of the calendar to open.

    Outlook 2007 - Shared Calendar

  • Click in the box to place your cursor and type &FRS.ApparatusMovement.
  • Click the OK button. Note that the calendar opens but it may take a few minutes to import all of the data on this first time.
  • Use the calendar as you need.
  • Find the All Calendar Items section again and you’ll see the apparatus calendar with a checkbox next to it.

    Outlook 2007 - Calendar Selected

  • Uncheck the calendar when you don’t want to see the data on your screen. (For some people, it can be in the way of their own calendars.)

Handle an Attachment

When you receive an attachment for an Office document in these months before we all move to Office 365 (i.e., Word, Excel, PowerPoint), you have two options:

  • Edit the document in 365
  • Edit the document in your locally installed software (e.g., Word 2003 or Word 3007)

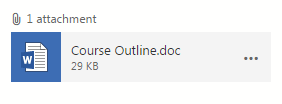
Here’s what the attachment looks like in Outlook 365:


O365_attachment

To edit in 365, simply double-click the document.

To edit in 2003 or 2007, you’ll need to download the document (save it to your computer) and then open it. To do so:

  • Click once on the elipses (…) to the right of the attachment.
  • Choose Download.
  • Wait for the document to finish downloading, as seen in the lower left corner of the screen.
  • Click once on the downloaded document.

To send the downloaded and edited document to someone (or back to the  original sender), you’ll need to save the file somewhere on your computer and then attach it to an e-mail message.

Mark New Messages as Read Automatically (System Settings)

  • Click the gear symbol at the top-right of the screen.
  • Select Options and Outlook will default to the Account options.
  • Click Settings on the left-side navigation.
  • Find the Reading Pane section on the right side of the screen.
  • Find the statement labeled Choose When Items Should Be Marked as Read.
  • Click the first item, Mark the Item Displayed in the Reading Pane as Read, if you would like to have Outlook change the read/unread status while you are reading any given message. Note: This will trigger read responses that have been requested so people who track such things do not think you have deleted the mail without reading.
  • Change the number in the box to 1 (second).
  • Click the Save button at the bottom of the screen.