TechTips

Retrieving a Collision Report in Risk MAP

Are you a BC who needs to retrieve a collision report? Did you start a report and now, a while later, need to complete it?

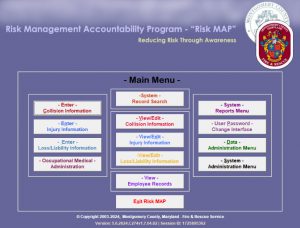
  • Log into Risk MAP to see the main menu.

    Main Menu for Risk MAP

  • Find and click the View/Edit Collision Information button in the middle column.

    View Collision Report Button

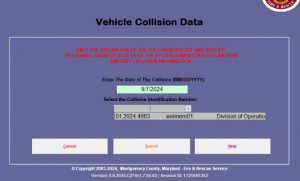
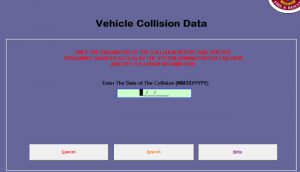
  • Click the date field in the middle of the screen. Note: Input the date of the collision (which would have been entered by the report writer), not the current date.

    Risk MAP Date Field

  • Press the Tab key on your keyboard to make the resulting drop-down list appear.
  • Click the drop-down arrow below the date to see the reports associated with that date. There may or may not be more than one report. The info listed for each report will be:
    • Risk MAP report number
    • Single sign-on username of the report author
    • Division selected within the report (specifically the division to which the vehicle in question is associated)
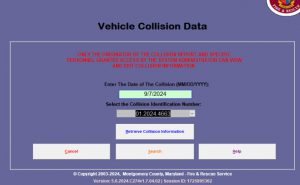
  • Click to select the report you would like to open. (Note: Do not click the Search button.)Risk MAP List of Reports
  • Click the Retrieve Collision Information button that appears below the report number.Risk MAP Report Identified
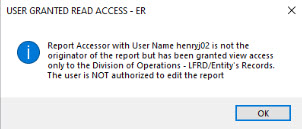
  • Note the dialog box that appears if you are not the author of the report you are about to open. (Note: If you are the report author, you will get a different dialog box which indicated you are the originator of the report.)

    Risk MAP Open Report Warning

  • Click the OK button to open the report.

Note: All access and changes are logged behind the scenes in Risk MAP. Be careful not to make any changes to any fields if you are simply viewing a report.
Changing or Removing Your Microsoft Program Avatar

Are you looking for a way to remove the picture you have as your Microsoft avatar? Are you currently represented as your favorite sports team logo, cartoon character or hand gesture to express your frustration because you can’t figure out whether Bingo was the name of the farmer or the dog?

The ideal way to fix this and follow county guidelines is through the Teams app (which should load on any county computer once you have signed in). If Teams doesn’t come up on your computer, just search for it with the other programs.

  • Find and click your avatar at the top-right corner of the screen.
  • Click your picture in the resulting box.
  • Click Remove to have just your initials appear in place of your pic or click Upload to replace with a pic of yourself.

Note: You can only change the pic in Outlook Web, not remove it entirely. You can only remove it via the Teams app.

If you are stuck and just can’t get this to work, please submit a TSR.

Finding a Caller’s Phone Number to Get More Information

Scenario: You have been dispatched on a call and need more information from the caller. Did you know that you may bypass ECC and just call the individual yourself, using the apparatus Sonim phone?

  • Find the incident on the incident screen if you are not already seeing the incident summary.
  • Click the Persons tab, located in the vertical navigation on the left side of the screen.
    P1 MDC Persons Tab
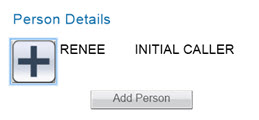
  • Click the + symbol next to the person’s name.
    P1 MDC Caller's Name
  • Find the caller’s phone number on the right side of the screen, if available.

Setting up OneDrive for Network Scans

Do you have documents you need to scan, but you don’t want to send them one by one to your e-mail account? OneDrive will let you set things up so that you may scan on the big county copier/scanners and then send the files directly to your OneDrive account.

  • Open a browser and input the following URL in the address bar, but replace username with your county SSO username:
    https://mcgov-my.sharepoint.com/personal/username_montgomerycountymd_gov/_layouts/15/mngsiteadmin.aspx
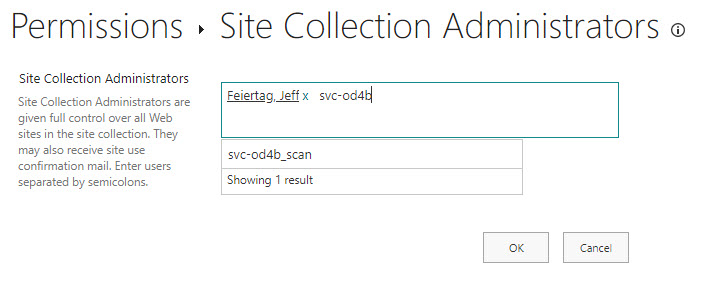
  • Click in the box next to your name and type to search for svc-od4b_scan.
    OneDrive Setup for Scans
  • Click to select on the search result (svc-od4b_scan) and click the OK button.
  • Use the Ricoh to scan your document(s).

Logging into PSTrax (ALS Providers Only)

Assuming you are an ALS provider with MCFRS and you have rights to PSTrax, here is a set of instructions for logging into the system. If that still does not work, please submit a TSR. If it is an emergency and you need to log meds at the moment, please contact the FRS IT standby number (240.777.2233, option 1). Still, try the following procedure first:

=-=-=-=-=-=-=-=-=-=-=-=-=-=-=

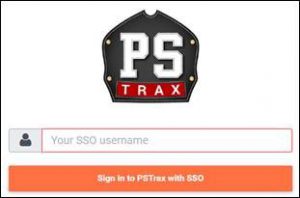
If you are logging into PSTrax and are doing it from a computer on which you have already logged onto a Microsoft app (such as Outlook), you will only be prompted for your PSTrax login (which is your full e-mail address, using firstname.lastname@montgomerycountymd.gov).

PSTrax Login Screen

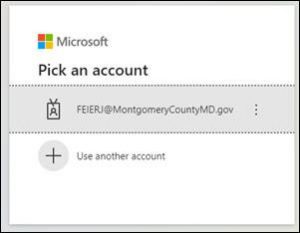
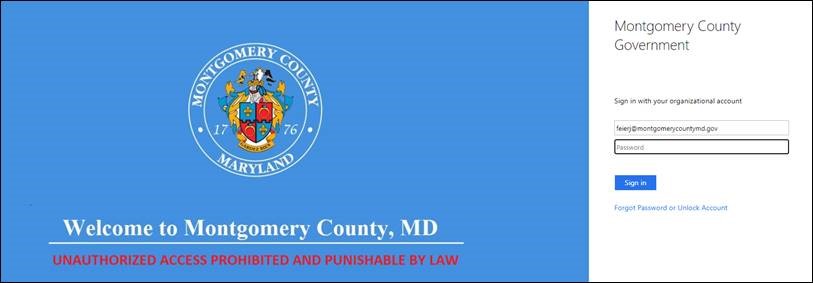
If you are logging into PSTrax and are doing it from a computer on which you have NOT logged into any Microsoft app (such as the ePCR or even a county desktop), then you will get three login screens. The first is the PSTrax login with your full firstname.lastname@montgomerycountymd.gov address, followed by the Microsoft login page, using your SSO@montgomerycountymd.gov address.

PSTrax Login Screen

PSTrax Login - Microsoft Login Screen

PSTrax Login Screen - MCG Login Screen


Announcing the New ePCR Computer: Panasonic FZ-G2

As you may have heard, MCFRS is replacing all of the Panasonic CF-20 ePCR machines with a new model, the FZ-G2. (This does not affect Elite or anything else you may run on the machine.) The replacement is occurring one battalion at a time over the summer and early fall of 2023. Here are some important notes:

Stability and Docking

  • The new machines are sturdier than the current CF-20s.
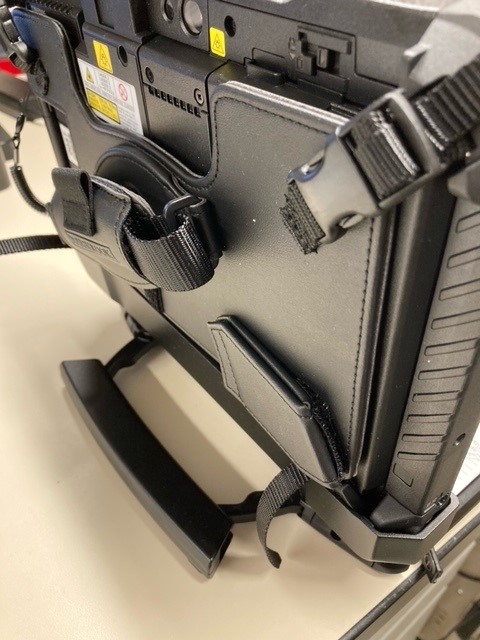
  • Docks have been outfitted with wings to help keep the ePCR from dropping to the ground. (Note: You will mount it vertically.)
  • The new machines are top-heavy, so you should use the handle as an outrigger to balance it and prevent it from falling backward.FZ-G2 ePCR Model

Networking

  • The machines are no longer stand-alone computers. The FZ-G2 will connect to the county public safety network using the same technology as the MDC (a program called NetMotion and protected by iBoss).

Keyboard

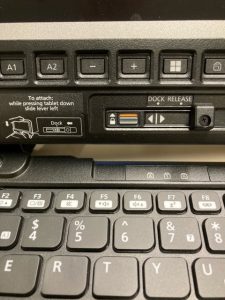
  • The connection between tablet and keyboard is manual (for a more reliable connection).
    • There is no auto-locking, so please follow the instructions on the keyboard base to avoid gravity-related problems.
    • The DC cover on the bottom-left side of the tablet must be closed prior to placing the tablet into the keyboard base. The tablet must be pressed firmly into the keyboard base while the locking mechanism is slid to the left.FZ-G2 Keys

USB

  • There is an easy-access USB port on the left side of the keyboard base for you to connect the Airtraq camera.
  • The port is protected by a sliding door.

PSTrax

  • Attention, ALS Providers: There is a shortcut for PSTrax on the desktop. As a reminder, you must have completed your training to use the system. (Training deadline is 08/01. See here for the training and please use your tech training login credentials.)PSTrax logo


Answering Some 800 MHz Radio (Model 8000) Questions

With the May 2023 rollout of the model 8000 radio, some field personnel have been asking questions. Here are answers to the common questions:

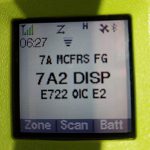
  • The Wi-Fi symbol will be starting to appear on radios as the Wi-Fi system is turned on at stations.  It is the symbol above the C in MCFRS and below the scan symbol. The only purpose of the Wi-Fi is for radio programming. (No, you cannot connect your phone to the radio and surf the web.)

    800 MHz Portable Radio Model 8000 Interface

  • The satellite symbol between the Bluetooth and H indicates GPS lock. If it is flashing, it does NOT have GPS reception like when in a building.
  • The H indicates the channel or talkgroup is transmitting in high power. There are some channels by regulation that must transmit in low power and those will display an L.
  • The 3 dot button on the face of the new RSMs is unused right now and does nothing

Synching a PW Change with Windows Laptop and County SSO (for Teleworkers)

This TechTip is directed toward people who telecommute.

A common problem for many has been, when they have to change their single sign-on passwords every 90 days, that the network password updates while the Windows password doesn’t immediately change (and may take days or weeks to catch up). Most commonly, that occurs when a person changes the password via ePortal and not Windows.

Instead:

  • Log onto the VPN on your laptop.
  • Press Ctrl-Alt-Delete on your keyboard and choose Change a Password.
  • Type the old password and the new one twice, as requested.
  • Press the Enter key or click the right-arrow on the side of the second new password input box.

That’s it. Both the laptop and all of county single sign-on applications will accept the new password (although it might take a few minutes to update across all of the servers). Remember, though, it is imperative that you update your password on mobile devices where you have mail accounts set up, or else you will lock up your account when the device(s) try to use the old password.