Creating New Stencils in Visio

Each first due has features unique to that area.  Visio allows you to create a stencil that is uniform and specific to your station. These new stencils can be accessed in One Drive by anyone in your station that works on maps.  For example, you can add hydrants (already on a layer) to the stencil, you can add any new symbols you have created (such as Knox Boxes or FACP’s), you can even use for street names (to make size and font uniform) or for map page identifiers.

Note: If you add items to a layer (see Tech Tip on layers) before adding it to the stencil, then it will automatically be on that layer every time you drag and drop from stencil in the future.

To create your own stencil, follow these steps.

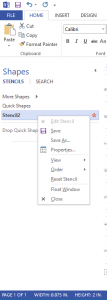
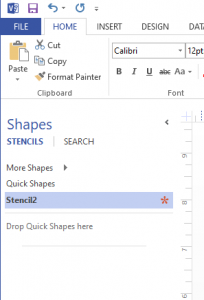
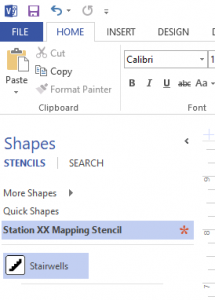
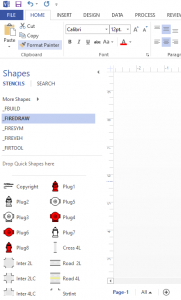
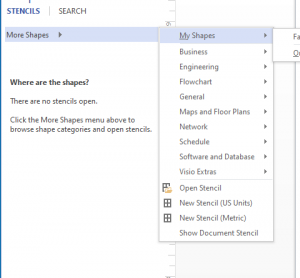
  • Click More Shapes in the stencil menu and then select New Stencil (US Units).  This will create a new stencil that has a number after it.

  •  Right click on this stencil and select Save As.  Type a name for the stencil.Note: Save the new stencil to One Drive or the backup location where your station is saving their maps.  If you save it locally, the new stencil can only be accessed under your profile.


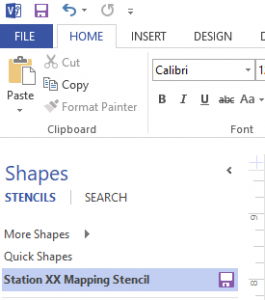
You will notice that there is a small asterisk symbol next to your stencil name.  Anytime you add something to the stencil, this will change to a floppy disk symbol as a reminder that your stencil must be saved.

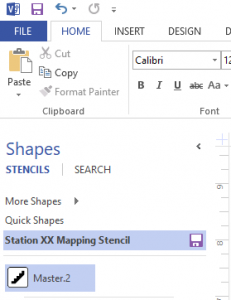
  • Click on the floppy disk symbol regularly to save changes to your stencil.


  • Drag items from your map into your stencil and rename as needed.
    

Opening Stencils in Visio

MCFRS has several stencils that can be utilized when creating maps and for training purposes.  These stencils contain common items such as hydrants for creating preplans, hoseloads and apparatus for creating driver training equations, structure mockups for creating scenarios for training and many more.  To access these use the following steps.

  • Find and click the Stencil Menu

  • Find and click More Shapes, once the stencil menu has expanded.
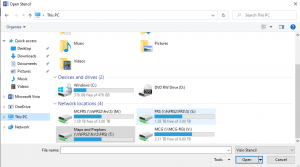
  • Select Open Stencil


  • Click This PC and select the T: Drive.  The T: Drive contains Montgomery County Maps and Preplans.
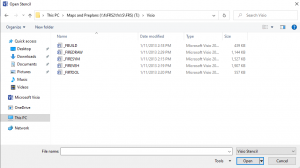
  • Click on the “Visio” folder and select the 5 stencils that are listed.  These five stencils are now available to use in your stencil menu.


  • Click on a stencil and drag into your maps to use.


Understanding the 800 MHz Radio Changes (October 2022)

There are two main changes to the 800 MHz radio system for October 2022:

  • Fleetmap change regarding PG County zone
  • FDTA change regarding tone and EB

Fleetmap Change

PG County has realigned zone 8 to match MCFRS when it comes to Ops and Dispatch.

  • 8A1 is now Ops
  • 8A2 is now Disp

FDTA Tone Gone

Effective with the upgrade to your radio, you will no longer hear a tone when you press your PTT on FDTA. This may take some time for people to get used to, but it was necessary with the other change (EB, below).

FDTA EB Available (but Limited)

The EB is now functional on FDTA, but not exactly likely it is on talkgroups that go through the trunked system. (Remember, FDTA is still a simplex channel, unheard by ECC.) Here are the basics:

  • What happens when I am on FDTA and activate my EB?
    • You effectively launch an EB activation.
    • You will hear a tone every 10 seconds.
    • ECC will not know that you have launched an EB and it is up to your incident commander to include ECC.
  • Will people who are scanning FDTA know that I have launched an EB?
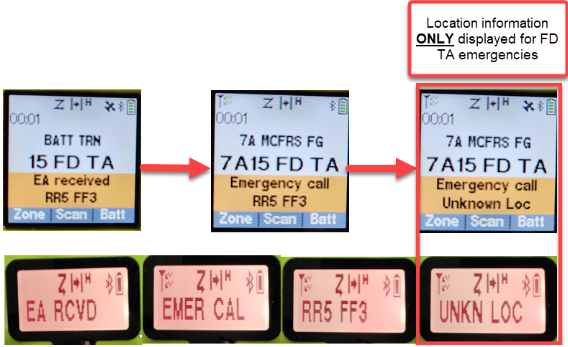
    • Their radios will flash EA received (with your apparatus name and position, as shown in the example below), but it will only flash for them. It will then jump back to their TG(s).
    • They will not hear an extended tone.
    • The orange banner will rotate briefly between your apparatus name with riding position and your known location (if accessible, unlike the image below).
      EB on FDTA
  • What is the range on who will know I have pressed my EB?
    • This is no different than the normal range for FDTA. Line of sight is about a mile, but buildings and various building materials shorten that.
  • What if I press the EB accidentally? Is clearing the EB on FDTA the same as on any other talkgroup?
    • Yes, simply press and hold a few seconds until it clears.
    • There is no need to tell ECC, though.


Recording a Save During a Fire in FireApp

Do you believe that someone on your incident saved a person from a fire? Effective September 2022, there is now a place in FireApp to record this. (Note: Do not worry about a formal department definition of the word save. If you believe one of the people on the incident saved a person, it is worth capturing.)

Once you add this to your report, a group of people in MCFRS will be notified and will contact you for more information.

  • Move to the Loss/Casualty tab in your FireApp incident report.
  • Find the Fire Save Data tab in the second-level navigation.
    Fire Save Data tab
  • Click in the box for Fire Saves Performed? and select the appropriate answer to the right (yes/no).
  • Click in the Number of Fire Saves box and select the accurate number, assuming your first answer was yes. (Note: The number will be required if you responded yes to having fire saves.)

Fixing the September 2022 Java Error

With the Java update of version 1.8.0_341, an error may arise. Here is the way to fix that error:

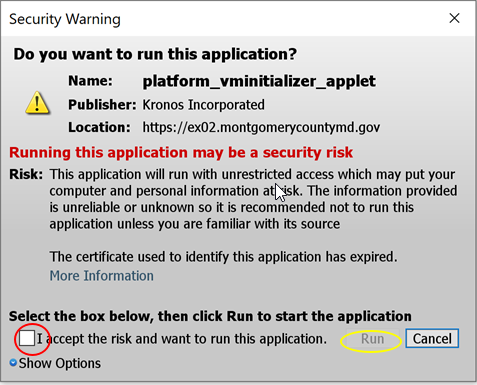
  • Note the security warning pop-up.
    Java Error Message
  • Check the box at the lower left corner, to indicate you accept the risk associated and click the Run button.
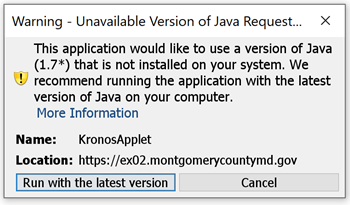
  • Wait for the next pop-up warning screen, as shown below:
  • Click the Run with the latest version button.
  • Wait for the last screen to appear, as shown below:
  • Check box box (labeled Do not show this again) and click the Allow button.
  • Run MCtime, Oracle or whatever other app you had intended when you were originally prompted with this error.

As with anything else tech-related, please do not hesitate to submit a TSR if you still have trouble.


Requesting to Record a Video Meeting

In an email to Montgomery County department heads dated April 1, 2022, the Chief Administrative Officer provided direction that we must limit use of the recording features in our online meeting systems (Teams, Google, Zoom) to only those selected personnel who need to record:

  • Formal trainings intended for large audiences
  • Public meetings, where there is no expectation/obligation of privacy and meeting is open to public

As such the MCFRS will use the following process for obtaining authorization for recording meetings for a specific window of time.

Form Submitter’s Role:

  • Submit a Tech Service Request (TSR) and choose Meeting Video Recording Request for the category. In the auto-generated e-mail reply, you will see a link for the Meeting Video Recording Request Form. Click that link.
  • Fill in the form. Some notes on the form:
    • Choose Other as your rank if your rank is below battalion chief (career), if you are not an LFRD chief (volunteer) or if you are not an M3 (civilian)
    • Ensure that you have no typos when you input your supervisor’s e-mail address. That individual will receive e-mail that requests for chain-of-command information.
    • Note that, for the purposes of this form, the chain of command among the LFRD will be from the person submitting the form, to the LFRD chief and then to Division Chief Mike Kelley.
    • Select the appropriate video technology you plan to use (Google Meet, Teams or Zoom).
    • Identify the start and stop dates for recording capability.
    • Read the paragraphs of fine print very closely, as they are important. By submitting the form, you agree to them.
    • Supply the specific reason you are recording the event in the text box provided.

Supervisor’s Role:

Preface: If you are an AC, DC or LFRD Chief, please skip to the Approver’s Role section below.

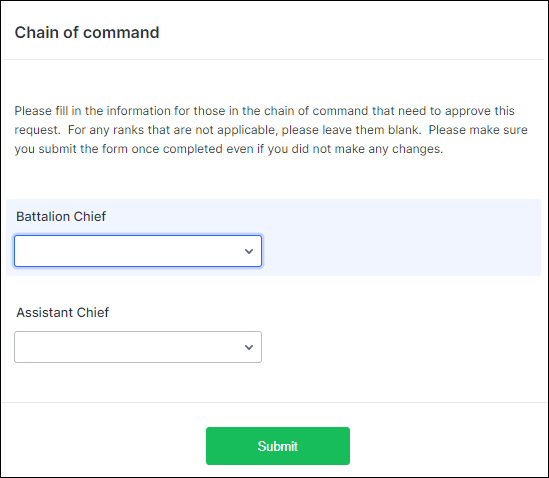
  • Receive the e-mail and click the link to fill in chain of command, if applicable.
    CofC Link in E-Mail Message
  • Fill in the necessary information.
    CoC Fields
  • Click the Submit button.
  • Receive the e-mail message and approve/deny as needed. Approval will move the request up the chain of command.

Approver’s Role:

  • Receive the e-mail and review the request details.
  • Click the Approve or Deny button and wait for the form to load in your web browser.
    Video Approve or Deny Buttons
  • Change your response, if needed, and then (for approve or deny) provide the reason why you are approving or denying the request.Video Record Denied
  • Click the Complete button.Note: The form will then trigger e-mail to the next level in the chain of command. This process will continue through the division chief’s approval or denial of the recording request. The MCFRS IT Web Coordinator will then activate the recording capability (Google Meet and Teams) or request TEBS to activate the capability (Teams) and follow up with the requestor.

Approving Working Out of Class (WOC) Hours as a Battalion Chief

Scenario: You are a battalion chief and you have received e-mail, requesting approval of Working Out of Class (WOC) hours.

  • Pull up the Crystal Report to compare the hours listed in your e-mail message to what appeared in TeleStaff, ensuring that the requested hours WOC are legitimate.
    • Go to Quicklinks | Crystal Reports | WOC Audit | Activity Audit Report.
    • Input the proper date range.
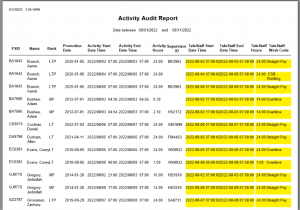
    • Note the following sample report:
      Working out of Class - CR Report
  • Log into FireApp and click the WOC button, found toward the bottom of the left-hand navigation.
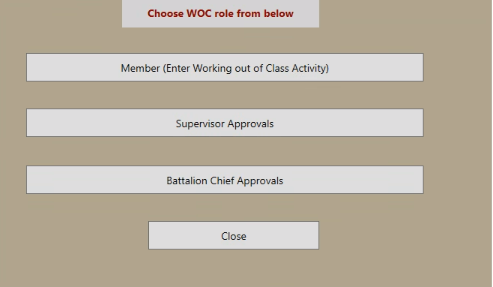
  • Click the Battalion Chief Approvals button.
    Working out of Class - Role Buttons
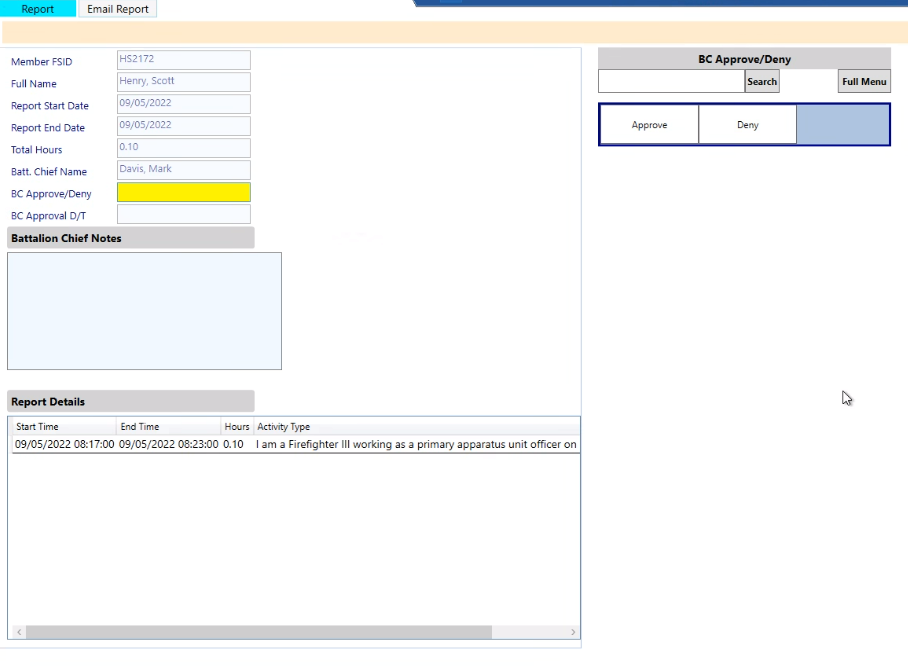
  • Review the report details.
  • Click the Approve or Deny button for each entry. Note: If you choose Approve, the report will queue to go to the employee. If you choose Deny, e-mail will queue to go to the employee who submitted the hours to note that the hours have been denied. Further, please input a reason in the Supervisor Notes box if you deny hours, to explain why you are denying the hours.
  • Click the Email Report button. If you do not click that button, the process is not complete and no e-mail will send.WOC E-Mail Button on Approval
  • Click any other FireApp menu item (including Log Off) in order to leave the screen.

Please email the WOC administrator at FRSWOCAdministration@montgomerycountymd.gov, if you have any questions.

Creating a Working Out of Class Report to Submit for Approval (MFF or LT)

Scenario: You are MFF or LT who has been working out of class (for at least 280 hours in the last six months, plus 10 days) and would like to submit a report for approval.

  • Log into FireApp and click the WOC button, located near the bottom of the left-side navigation.
  • Click the Create Report button after you have created your WOC entries. (If you have not yet logged those entries, please click here for directions.)
    Working out of Class - Create Report Button
  • Check the boxes of the items you wish to include in your submission for approval.
    Notes:

    • Anything grayed out has already been submitted. If an item was denied in error, you will need to resubmit that entry.
    • All selectable items (i.e., non-gray) will appear at the top of the list.
  • Select the appropriate battalion chief from the drop-down list and click the Send to BC button.
    Note: You will not be able to send the report until you select a BC. When the items you have selected turn gray, you will know that the report has been sent. From there, you will also get an e-mail confirmation message.
  • Log off of FireApp when you are finished.

Creating a Working Out of Class Report to Submit for Approval (FF3)

Scenario: You are a FF3 who has been working out of class and would like to submit a report for approval at the end of the pay period. (Note: To cut down on the possibility for error, it is preferable for you to submit one report per pay period.)

  • Log into FireApp and click the WOC button, located near the bottom of the left-side navigation.
  • Click the Create Report button after you have created your WOC entries. (If you have not yet logged those entries, please click here for directions.)
    Working out of Class - Create Report Button
  • Check the boxes of the items you wish to include in your submission for approval.
    Notes:

    • Anything grayed out has already been submitted. If an item was denied in error, you will need to resubmit that entry.
    • All selectable items (i.e., non-gray) will appear at the top of the list.
  • Select the appropriate battalion chief from the drop-down list and click the Send to BC button.
    Note: You will not be able to send the report until you select a BC. When the items you have selected turn gray, you will know that the report has been sent. From there, you will also get an e-mail confirmation message.
  • Log off of FireApp when you are finished.

Understanding MIS

MCFRS field staffing employees work shiftwork (96 hours in a pay period) and are assigned to a station, shift and Kelly Day (day off).  Each day of the week is assigned a number 1 through 7…Sunday is 1, Monday is 2, Tuesday is 3 and so on.  Shift workers work 24 hours and are off for 48 hours.  Based on that, the employee’s schedule fluctuates each pay period.

When the Kelly Day falls on the employee’s shift to work, the employee is off, meaning they only work 72 hours that pay period.  To make the employee whole and pay them for 96 hours, they are given a MIS Advance of 24 hours (72 + 24 = 96 hours).  When an employee works too many hours in a pay period (5 shifts), a negative MIS of 24 hours is applied to make them whole (120 – 24 = 96 hours).  Some pay periods, an employee will work 96 hours and no adjustment is needed.  The MIS was designed to provide a stabilization of pay for MCFRS employees who don’t work the same number of hours in a standard pay period.

The MIS adjustments are added to the employee’s timecard on the 1st Sunday of the affected pay period and appear on the employee’s payslip under Earnings.

Employees with a Sunday, Wednesday or Saturday Kelly Day never require an MIS adjustment…. they always work 96 hours in a pay period.

Each shift (A, B & C) has a different MIS cycle.

Additional scenarios re: MIS

  • Employees assigned to ECC work 84 hours each pay period and they have triple Kelly Days.
  • Employees assigned to FEI work 84 hours each pay period and they have a Kelly Day equivalent.
  • Employees on long term details or special schedules are given a Kelly Day equivalent.

Field staffing personnel have a 6-week MIS cycle

ECC personnel have a 12-week MIS cycle

FEI personnel have a 8-week MIS cycle

This information comes courtesy of FRS HR. Please contact them if you have any questions or concerns.