ePortal

Getting Started with a New County Account

Were you just assigned a new MCG account? The following TechTips/links may help you:

If you have any questions or need troubleshooting, please submit a Technology Service Request (TSR) and someone from FRS Technology will contact you.

Adding an Alternate E-Mail Address or Cell Number for MFA

Do you prefer not to use your MFA key fob when you need to access county e-mail or ePortal? You may opt to use a personal e-mail address or cell number to receive a multi-factor authentication code.

  • Log into ePortal.
  • Hover over the words AccessMCG Self-Service, located at the top-right corner of the screen.
    AccessMCG Menu Link
  • Choose Manage Account.
  • Log into ePortal again, as prompted.
  • Find and click Setup Alternate Phone/Email/App Contacts.
    MFA Option to Add E-Mail or Phone
  • Input an MFA code, if you receive one to an existing (pre-setup) location.
  • Add your personal e-mail address and/or cell phone number. When you add one, click the Save button and input the code that is sent to that location, to finalize the connection between ePortal and the account/device.
  • Click the Continue button.
  • Click the Logout link at the bottom of the list of links.

Installing the MFA App on a New iPhone

Did you use the county’s app for multi-factor authentication (MFA) and then found it didn’t work when you migrated to a new phone? Here are the directions to get it working again for you.

Note: County Apple redeem codes are tied to your Apple ID, so please do not attempt to install the AccessMCG MFA app on a device with a different Apple ID.

Launch the App Store on your new phone.

Tap the account profile, either a silhouette or your picture in a small circle at the top-right corner of the screen.

Tap Purchased to access a list of apps you have purchased/downloaded.

Scroll to the AccessMCG MFA app in the list and tap the download button to the right of the app name.

Wait for the device to finish downloading and installing the app.

Launch the AccessMCG MFA app on your device.

Going to ePortal (via Quicklinks) and click the My Account button. Log in thereafter and complete the activation.

Choosing Where (and Where Not) to Send Your MFA Code for Office and ePortal

When you go to log into ePortal or Office, are you getting a code for multi-factor authentication (MFA) in too many places? Do you prefer to change where it’s going now?

Go to ePortal (either by direct link or via Quicklinks).

Click the My Account button and log in as directed. (Key in the MFA code you receive.)

My Account Button


Find and click Select Multi-Factor Authentication Options link in the list.

Select MFA Options Link


Key in the MFA code that the system sends you.

Check or uncheck boxes to set your preferences as to where you would like to receive MFA codes from the county and click the Save MFA Options button.

Save MFA Options button


Log out of ePortal when you are finished.

Changing Your Insurance Setup during Open Enrollment

Need to change your insurance setup? This is done each fall during Open Season. Here is the basic approach:

Log into ePortal (either directly here or via Quicklinks) and then click the link for Employee Self Service.

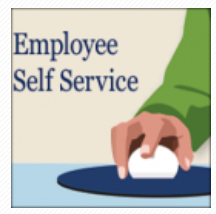
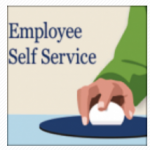
Click the picture of the hand with a mouse next to the Employee Self Service label.
ESS


Note the blue links on the left side of the page.  Click the link for MCG HR Employee Self Service in order to expand the list of links.

Click to choose Self-Service Benefits.

Note that the cover page for Dependents will likely load, showing any dependents you may have on file. Click the Next button to continue, located at the top-right corner of the screen.

OE Program Options


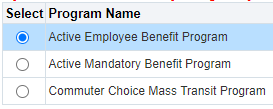
Ensure that the option for Active Employee Benefit Program is selected and click the Next button to continue.

Review the insurance options (showing your current selections with the new rates). Note that your current options will carry over to the new enrollment automatically, unless you change them. The only exceptions are FSA and HSA, which both reset to $0 each year. If you would like to change any insurance options and/or add money to either the FSA or HSA accounts, click the Update Benefits button, located at the top-right corner to continue.

Choose whatever options you prefer. (Again, current selections are already filled in with the assumption that you want to continue your coverage as it now stands.)

Add coverage for Health Care FSA and/or Child Care FSA as you see fit. If you are going to do so, enter amount for the entire calendar year in the appropriate Coverage input box. The amount will be evenly divided by 26 (the number of pay periods in the calendar year), and that much money will be taken from your paycheck to pay for the service. For example, the screen shot below shows FSA coverage of $520, which will cost the employee $20 per pay period.

FSA Example

Click the Next button, located at the top and bottom right corners.

Review the dependent coverage and make changes as needed. Click the Next button when ready.

Attach any new enrollment or certification documentation, and then click the Next button to continue.

Review the complete coverage and cost information. Click the Printable Page button to print a receipt of the changes you have made.

Click the Finish button, located at the bottom-right corner of the screen, when you have completed the process.

Click the ePortal logout button, located at the top-right corner of the screen (as shown below).

ePortal Logout