Officer

Approving of Denying Working out of Class Entries

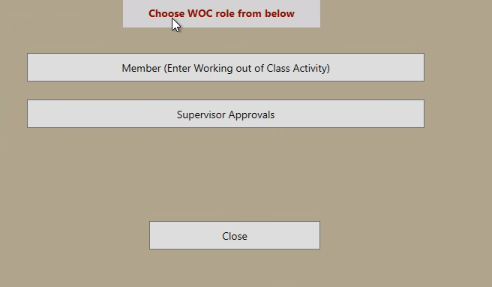
Effective 07/01/2022, all tracking for working out of class is now performed via the FireApp Working out of Class (WOC) module.

Scenario: You have received e-mail, indicating that someone you supervise has submitted an entry for working out of class.

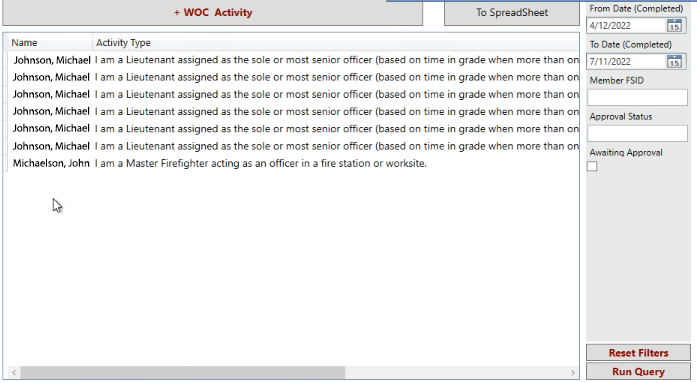
  • Log into FireApp and click the WOC button, located near the bottom of the left-side navigation. You will see any entries which require your attention. (Note: Do not reply to the e-mail you received about the WOC activity to be approved; they are not monitored.)
    WOC Data List for Officer
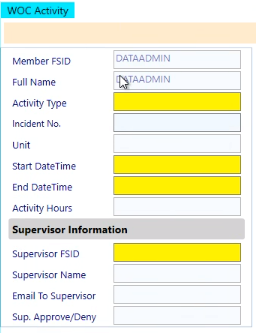
  • Click to select the one which you would like to approve or deny.
  • Review the details for the submission and click either the Approve or Deny button.
    WOC Approve and Deny window
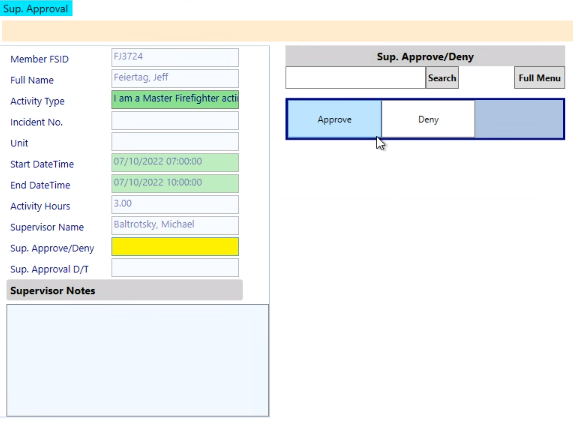
    Note: You may not approve any entry that is greater than 24 hours, excluding Daylight Savings.

Entering Out of Class Hours in the FireApp WOC Module

Have you worked out of class (F3 as a primary apparatus officer, MFF as an officer in a station, MFF to primary unit officer while LT or LT as the sole or senior-most officer)? Effective 07/01/2022, out-of-class tracking is now done through FireApp’s Working Out of Class (WOC) module.

  • Log into FireApp.
  • Click the WOC button, located near the bottom of the left-side navigation panel.
  • Click the Member (Enter Working out of Class Activity) button.Working out of Class Role Selection
  • Fill in the necessary fields.
    New Working out of Class Entry
  • Note the following:
    • Activity Type: Select one of the four options.
      Working out of Class Entry Rank Options
      Note: The Firefighter III as a primary apparatus unit officer option will require you to select the specific incident and unit on which you worked out of class.
    • Start DateTime and End DateTime: Identify the period in which you worked out of class in this role. This entry must be equal to or less than 24 hours. If you enter a time range which is greater than 24 hours, your supervisor is directed to deny the entry, except for daylight savings. (If you need to enter time for the period after 24 hours, such as for an incident than ran over into the next day, simply input a second entry for that next day’s activity.) Since tracking is now performed through the FireApp WOC module, you may enter hours that occurred prior to the last six months (plus a 10-day grace period), factoring in a rolling six-month period.
    • Activity Hours: This field will auto-calculate, based upon the start and end times.
  • Click the Send to Superv(isor) button, located at the top of the screen.
    WOC Send to Supervisor Button
    Notes:

    • This will send e-mail to your assigned supervisor. If your supervisor is on extended leave or you need to change supervisors for some other reason, you may search for another officer by using the Supervisor FSID field.
    • If you make a mistake and switch to another FireApp module (effectively saving this entry without sending it to your supervisor), you may return to the WOC module and continue the entry. Additionally, if you made an error and want to have the record removed from the database, simply submit a TSR to request the entry be deleted. Please be as specific in the description as you can.

MCFRS Tech Training Refresher – Using PCAP for Officer Tasks

Answering Common Questions from Station Personnel

Here are responses for two questions commonly asked by field personnel:

Question: Why didn’t my officers receive a supervisor endorsement? Why is my officer unable to
submit an endorsement for my vacancy application?
Answer: The officer’s e-mail address was incorrectly entered in the References section of the
application.

Question: Why haven’t I been promoted to FFII/FFIII yet, even though I have met the
requirements?
Answer: If the candidate’s qualifications were just recently met, please note that (s)he may need
to wait a few weeks for the promotion to be reviewed. It is also possible that the candidate’s
annual certification dates may not yet have been entered into PCAP.

MCFRS Tech Training Refresher – Using PCAP for Officer Tasks

Endorsing Personnel (Adding Positive or Negative Comments to Their Applications)

  • Find the Admin Tasks menu (only available to officers and administrative users) and select
    Endorse Staff.

menubar - Admin - Endorse

  • Select the appropriate individual from the list and click the Next: Endorse Staff button.

Endorse1

  • Verify that you have chosen the correct staff member.

Endorse2 - Comments

  • Find the Endorse this Staff option and select either Yes or No.
  • Type some comments to justify your selection. Note: There is no spell-check available so you
    may want to copy and paste from Microsoft Word after using spell check there.
  • Click the Submit Endorsement button. It will be saved in the system and you may either
    logout (using the Logout button at the top-right of the screen) or move to another system
    task.

MCFRS Tech Training Refresher – Using PCAP for Officer Tasks

Certifying Personnel (Adding Certifications to Their Files)

  • Find the Admin Tasks menu (only available to officers and administrative users) and select
    Certify Staff.

menubar - Admin - Certify

  • Enter information in one or more search boxes and click the Search button. You may use an
    initial to broaden your search and you may also search only by rank if you prefer. Wide
    searches will produce longer lists; use the numbered page links at the bottom-right of the
    page to advance from one page to another.
  • Select the individual for whom you would like to add certifications and click the Next: Issue
    Certifications button.
  • Click the Enter New Certificate/License button to add a new entry to the list. If you
    would like to change an existing entry, click the Edit button in the appropriate row. To delete
    a certification, input an expiration date in the past for the individual row.
  • Select the appropriate certification from the certificate/license name drop-down list and input/change the related
    dates. By default, the issue date will be the date you input the new certification and you may
    change the entry to reflect the true date of certification.
  • Click the Insert button when you have finished the entry. It will be saved in the system and
    you may either logout (using the Logout button at the top-right of the screen) or move to
    another system task.