Windows/Network

Synching a PW Change with Windows Laptop and County SSO (for Teleworkers)

This TechTip is directed toward people who telecommute.

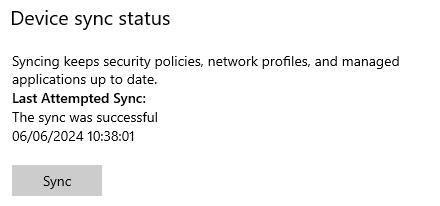
A common problem for many has been, when they have to change their single sign-on passwords every 90 days, that the network password updates while the Windows password doesn’t immediately change (and may take days or weeks to catch up). Most commonly, that occurs when a person changes the password via ePortal and not Windows.

Instead:

  • Log onto the VPN on your laptop.
  • Press Ctrl-Alt-Delete on your keyboard and choose Change a Password.
  • Type the old password and the new one twice, as requested.
  • Press the Enter key or click the right-arrow on the side of the second new password input box.

That’s it. Both the laptop and all of county single sign-on applications will accept the new password (although it might take a few minutes to update across all of the servers). Remember, though, it is imperative that you update your password on mobile devices where you have mail accounts set up, or else you will lock up your account when the device(s) try to use the old password.

 

Using Software Center to Add Software to Your PC

Did TEBS recently remove some software from your county PC, such as a browser? Software such as Chrome and Firefox must be loaded from a specific county location, instead of just a standard web download, so that it meets county specifications.

  • Ensure you are on the county network. If you are someone who teleworks, make sure you have logged into the network via VPN. If you are using a laptop in a county worksite, ensure that you are connected behind the firewall (as opposed to MCGuest).
  • Locate MCG Software Center on your desktop. If it is not a shortcut on your desktop, click the Windows start key on your keyboard and then type software. You will see search results for the Software Center app. Run it.
    Software Center App
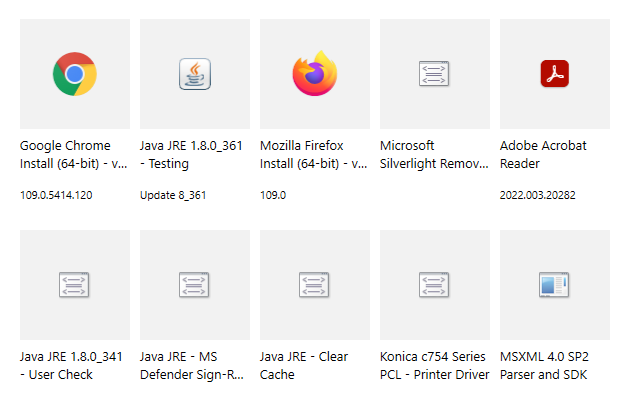
  • Note the list of apps in Software Center. Here is an example:
    SW Center Menu
  • Find and click the app you would like to install.
  • Click the Install button. you will know that the installation has finished when the black button is labeled Reinstall.

Updating Software Center to Show Most Recent App Availability

Are you trying to find something in the Windows Software Center, which you know should be there but is not? Here are directions to update Software Center to show the most current list of available apps.

  • Close Software Center, if you have it open.
  • Click the Windows start button (at the bottom-left of your taskbar) and type Control, but do not press the Enter key.
  • Find Control Panel in the resulting list and click it, in order to open it.
    Control Panel choice in Windows
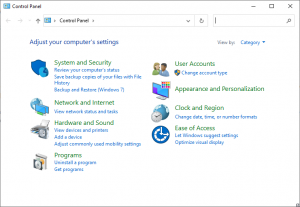
  • Wait for the Control Panel window to open, and then find the search box at the top-right corner of the window. Click in the search box.
    Control Panel
  • Type Config and you’ll see Configuration Manager appear as an option. Click the Configuration manager link
    Configuration Manager Option
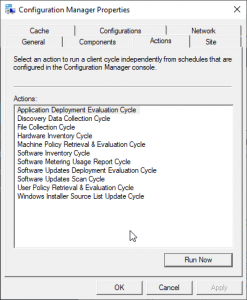
  • Wait for the Configuration Manager Dialog box to appear and then switch to the Actions tab.
    Configuration Manager Dialog Box
  • Find and click Application Deployment Evaluation Cycle in the list and then click the Run Now button, located at the bottom-right of the dialog box. Wait for that process to finish.
  • Find and click Machine Policy Retrieval & Evaluation Cycle in the list and then click the Run Now button.
  • Click the OK button and then close the Control Panel.
  • Re-launch Software Center as desired.

Setting up a New VPN Connection (County Laptop)

Have you been granted VPN rights, but now you don’t know the first thing to do? Here is your next course of action.

(Note: This presumes you’ll be using a county laptop to connect to the network, but won’t need to connect to a desktop in your office from that laptop.)

Set up Pulse Secure

  • Find and double-click MCG Software Center on your desktop. (This is only on county computers and you will not find this on your home computer.)
    Software Center Icon


  • Find and click to install Pulse Secure Client from the list. Go through the installation.
    Pulse Secure SW Center Icon


  • Run Pulse Secure. We now need to establish a connection (something you’ll do only once, as you will just use that saved connection after this point). The screen should show an empty list of connections and we’ll add one.
  • Click the plus (+) button in the Pulse Secure window to add a connection.
    Pulse Select Connections Header


  • Add the necessary info:
    • Type: (use the default Policy Secure or Pulse Secure).
    • Name: Call this whatever you would like. I recommend MCG or VPN.
    • Server URL: https://secure.montgomerycountymd.gov (unless DTS told you your server is secure2, in which case it would be secure2.montgomerycountymd.gov)
  • Click the Add button.

Connect to the VPN

  • Launch Pulse Secure (if you have not already).
  • Find the saved item for the county VPN and click the Connect button.
    County VPN Connection


  • Input your county single sign-on username and password (i.e., what you use to log into Windows in the office) when prompted and click the Connect button.
  • Wait for the connection to be made successfully. You will know it was successful if you see the green check mark next to the name of the saved connection.VPN Connection Successful


Disconnect from the VPN

  • Click the Disconnect button in the Pulse window when you are finished with county servers and want to disconnect.


Setting Up New a New VPN Connection (Laptop or Desktop to Connect to a County Desktop)

Have you been granted VPN rights, but now you don’t know the first thing to do? Here is your next course of action.

(Note: This presumes you’ll be connecting to your office/cub desktop PC in your office/cube and you don’t have your county notebook or PC at home with you.)

Office PC: Find out the hostname of your MCG PC. You’ll need this if you’re going to connect to it.

  • Click the Windows Start button.
  • Right-click Computer.
  • Choose Properties.
  • Find Computer Name about 3/4 down the screen.

Personal Notebook or Desktop PC: Set up Pulse Secure

  • Open a web browser and go to secure.montgomerycountymd.gov (or secure2.montgomerycountymd.gov, if DTS told you that your server is secure2).
  • Let the software install.

County Notebook: Set up Pulse Secure

  • Find and double-click MCG Software Center on your desktop. (This is only on county computers and you will not find this on your home computer.)
    Software Center Icon


  • Find and click to install Pulse Secure Client from the list. Go through the installation.
    Pulse Secure SW Center Icon


  • Run Pulse Secure. We now need to establish a connection (something you’ll do only once, as you will just use that saved connection after this point). The screen should show an empty list of connections and we’ll add one.
  • Click the plus (+) button in the Pulse Secure window to add a connection.
    Pulse Select Connections Header


  • Add the necessary info:
    • Type: (use the default Policy Secure or Pulse Secure).
    • Name: Call this whatever you would like. I recommend MCG or VPN.
    • Server URL: https://secure.montgomerycountymd.gov (unless DTS told you your server is secure2, in which case it would be secure2.montgomerycountymd.gov)
  • Click the Add button.

Connect to the VPN

  • Launch Pulse Secure (if you have not already).
  • Find the saved item for the county VPN and click the Connect button.County VPN Connection


  • Input your county single sign-on username and password (i.e., what you use to log into Windows in the office) when prompted and click the Connect button.
  • Wait for the connection to be made successfully. You will know it was successful if you see the green check mark next to the name of the saved connection.VPN Connection Successful


Connect to Your Work Desktop

  • Click the Windows start button at the corner of the Windows taskbar.
    Windows Start Icon


  • Type Remote and click to launch Remote Desktop Connection.Remote Desktop


  • Key in the name of your hostcomputer (as you found in the very beginning of these instructions) and press the Connect button.
  • Enter your SSO login username and PW as though you were sitting at your office computer.


Customizing the Start Menu

Windows 10 allows you to customize and make the Start menu your own.

Customizing tiles is easy:

  • Click and drag tiles to rearrange them on your Start menu
  • Right-click tile to unpin the tile from the Start menu altogether
  • Drag a tile all the way to the bottom of the menu, it’ll create a new category, which you can rename

You can change the size of the tile:

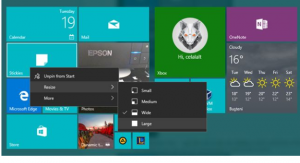
  • Right-click a tile to pick from four sizes—small, medium, wide, and large—each of which will show different amounts of information.

resize3

If you decide you don’t want a tile to show live info, but want to keep the shortcut, you can right-click it and choose “turn live tile off”.

To add a new tile:

  • Find the tile in the All Apps section
  • Choose Pin to Start

Personalizing Your Desktop

Windows 10 allows for the user to personalize and customize their desktop.

To access the Personalization settings:

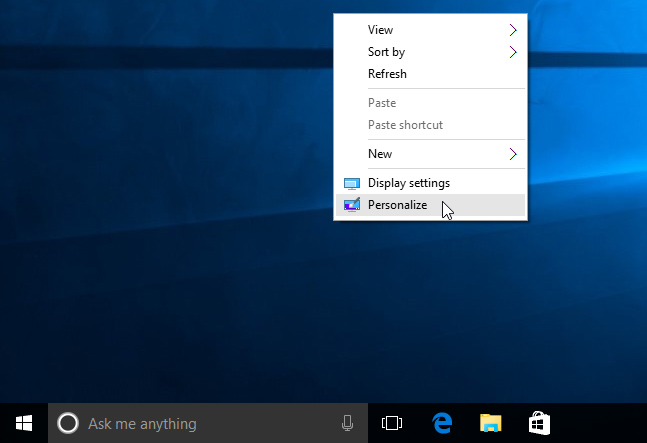
  • right-click anywhere on the desktop
  • select Personalize from the drop-down menu.
opening the Personalization settings
or
  • Click on Start menu
  • Choose Settings
  • Choose Personalization

personalize

In the Personalization menu, the user can change backgrounds, colors, themes, etc.


Utilizing Virtual Desktops

With Windows 10, the user can create an unlimited amount of Virtual Desktops.  Virtual Desktops allows the user to:

  • Group or organize multiple programs or group related windows
  • Locate and switch to any window or group of windows
  • Re-organize groups and move windows as tasks evolve
  • Control of the degree of separation between your grouped windows

The virtual desktops feature in Windows 10 is called Task View and is located on the Taskbar.  To add a virtual desktop:

  • Open up the new Task View pane by clicking the Task View button (two overlapping rectangles) on the taskbar,  TASKBAR
  • Click New desktop to add a virtual desktop.

or

  • Pressing the Windows Key + Tab

Windows_10

or

  • Press the Windows Key + Ctrl + D


Clicking the Task View button brings up the Task View interface, where you can see your open windows on virtual desktops you’ve added.


You can move programs among the different desktops you’ve set up.

To do so:

  • Switch to the desktop containing the program you want to move.
  • Click the Task View button on the Taskbar.
  • Right-click on the large thumbnail for the program you want to move
  • Select “Move to,” and then select the desktop number to which you want to move the program.

07_moving_a_program_to_another_desktop

The program now displays on the other desktop.


Windows 10 Keyboard Shortcuts

With Windows 10, Microsoft has added new keyboard shortcuts to give you easier access to the new Action Center, Cortana, Task View, and virtual desktops.

Listed below are a few of the most common Windows 10 keyboard shortcuts:

  • Press Windows key: Open/close the Start menu
  • Press Windows key + A: Open the Action Center
  • Press Windows key + C: Launch Cortana in listening mode (for voice commands)
  • Press Windows key + (Windows 7 and up): Launch File Explorer
  • Press Windows key + I: Open the Settings app
  • Press Windows key + S: Launch Cortana
  • Press Windows key + Tab: Open Task View
  • Press Windows key + Ctrl + D: Create a new virtual desktop
  • Press Windows key + Ctrl + F4: Close the current desktop
  • Press Windows key + Ctrl + left or right arrow: switch between virtual desktops