Best Practices

Finding a Caller’s Phone Number to Get More Information

Scenario: You have been dispatched on a call and need more information from the caller. Did you know that you may bypass ECC and just call the individual yourself, using the apparatus Sonim phone?

  • Find the incident on the incident screen if you are not already seeing the incident summary.
  • Click the Persons tab, located in the vertical navigation on the left side of the screen.
    P1 MDC Persons Tab
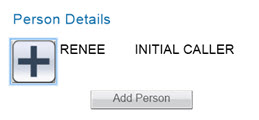
  • Click the + symbol next to the person’s name.
    P1 MDC Caller's Name
  • Find the caller’s phone number on the right side of the screen, if available.

Setting up an MCFRS Active911 Account

Would you like to set up an Active911 account with MCFRS? The process is simple, but some people need clarification. To make things easier on everyone involved, here is what you need to know:

  • Ensure you have met the prerequisite: You are either on the IECS list or you are serving in an admin role and have the permission of a chief within MCFRS.
  • Submit a TSR:
    • Ensure you choose the proper category: Messaging
    • Provide your phone type (just tell us Android or iPhone, please) if you do not have an Active911 account elsewhere
    • Provide your device code if you do have an account elsewhere
  • Look for the closed TSR ticket notification. In that message, the tech will provide you with a device code. You will need that.
  • Download and open the Active911 app for your phone/tablet.
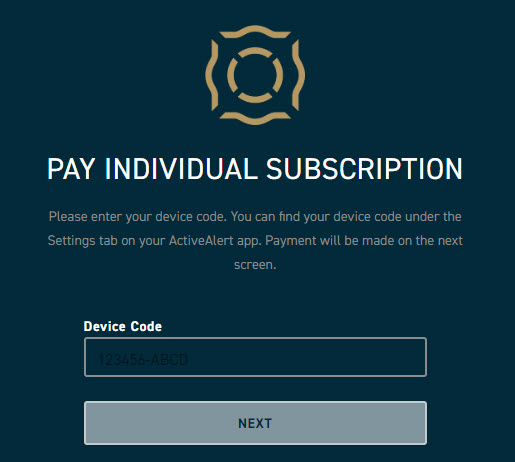
  • Find and click the Pay Individual Subscription button, located below the username and password boxes when you launch the app.

    Active911 Pay Button

  • Enter the Device Code in the Device Code box and click the Next button. Set up your payment and login information.

    Active911 Pay Setup Screen

    Note: If you do not pay for your subscription within a couple weeks, you will be in danger of having it deleted. In order to keep the database clean, users who have not subscribed are warned in a monthly e-mail message that accounts will be deleted by a date noted in the message.

Changing Your Mail Options for an Outlook Group

Have you joined (or been forcibly assigned to) an Outlook Group? By default, you may automatically be receiving any and all e-mail sent to the group address. However, you have some options and may limit how much of the mail you receive. Even if you choose not to receive any, it will always be available in the group inbox for you to see when you so choose.

Outlook Desktop Directions:

  • Open Outlook Desktop.
  • Scroll to the bottom of the inbox folder list and click once on the Outlook Group for which you need to change the mail options.
  • Note the change to the ribbon  at the top of the screen. One of the items should be Group Settings.
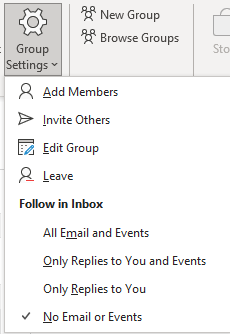
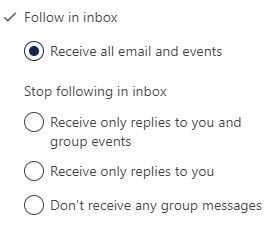
  • Click on the Group Settings button and note your options under the heading Follow in Inbox:
    Outlook Group E-Mail Settings
  • Choose No Email or Events if you do not want to receive any of the e-mail in your own inbox. Choose a different options as you see fit.

Outlook Web Directions:

  • Open Outlook Web.
  • Scroll to the bottom of the inbox folder list and click once on the Outlook Group for which you need to change the mail options.
  • Note the screen is now in three columns. In the middle column, you should see the name of the group. In the example below, the group name is _FRS_Defect_Pictures.
    Outlook Group OWA Screen 1
  • Click the ellipsis () found on the same row as Send email and choose Settings from the pop-up list.
  • Note the new panel that has appeared on the right side of the screen.
    Outlook Group OWA Settings
  • Choose No Email or Events if you do not want to receive any of the e-mail in your own inbox. Choose a different options as you see fit.
  • Click the X at the top of the Group Settings panel to close it (or just click elsewhere on the screen to close the panel).

Recording Early Leave before a Holiday (admin workers)

Scenario: Prior to a holiday, the fire chief announces that admin workers/civilian staff may leave early for the day. You are perplexed, though; how should you record this in MCtime?

The answer is pretty simple: Leave it as hours worked. If you were to use Admin Leave (a logical conclusion), you would be required to include a reason code and no such reason code exists.

So, per the FRS HR AC (12/06/2023), leave your time in MCtime as hours worked.

Setting up OneDrive for Network Scans

Do you have documents you need to scan, but you don’t want to send them one by one to your e-mail account? OneDrive will let you set things up so that you may scan on the big county copier/scanners and then send the files directly to your OneDrive account.

  • Open a browser and input the following URL in the address bar, but replace username with your county SSO username:
    https://mcgov-my.sharepoint.com/personal/username_montgomerycountymd_gov/_layouts/15/mngsiteadmin.aspx
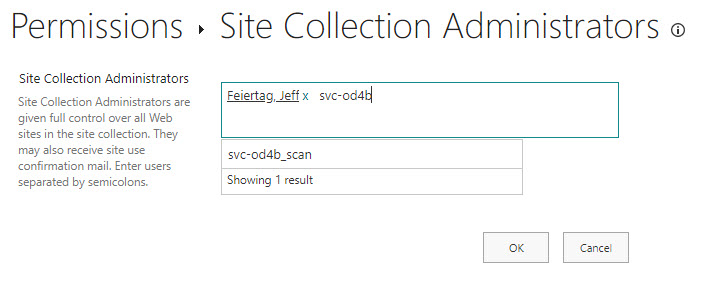
  • Click in the box next to your name and type to search for svc-od4b_scan.
    OneDrive Setup for Scans
  • Click to select on the search result (svc-od4b_scan) and click the OK button.
  • Use the Ricoh to scan your document(s).

Logging into PSTrax (ALS Providers Only)

Assuming you are an ALS provider with MCFRS and you have rights to PSTrax, here is a set of instructions for logging into the system. If that still does not work, please submit a TSR. If it is an emergency and you need to log meds at the moment, please contact the FRS IT standby number (240.777.2233, option 1). Still, try the following procedure first:

=-=-=-=-=-=-=-=-=-=-=-=-=-=-=

If you are logging into PSTrax and are doing it from a computer on which you have already logged onto a Microsoft app (such as Outlook), you will only be prompted for your PSTrax login (which is your full e-mail address, using firstname.lastname@montgomerycountymd.gov).

PSTrax Login Screen

If you are logging into PSTrax and are doing it from a computer on which you have NOT logged into any Microsoft app (such as the ePCR or even a county desktop), then you will get three login screens. The first is the PSTrax login with your full firstname.lastname@montgomerycountymd.gov address, followed by the Microsoft login page, using your SSO@montgomerycountymd.gov address.

PSTrax Login Screen

PSTrax Login - Microsoft Login Screen

PSTrax Login Screen - MCG Login Screen


Synching a PW Change with Windows Laptop and County SSO (for Teleworkers)

This TechTip is directed toward people who telecommute.

A common problem for many has been, when they have to change their single sign-on passwords every 90 days, that the network password updates while the Windows password doesn’t immediately change (and may take days or weeks to catch up). Most commonly, that occurs when a person changes the password via ePortal and not Windows.

Instead:

  • Log onto the VPN on your laptop.
  • Press Ctrl-Alt-Delete on your keyboard and choose Change a Password.
  • Type the old password and the new one twice, as requested.
  • Press the Enter key or click the right-arrow on the side of the second new password input box.

That’s it. Both the laptop and all of county single sign-on applications will accept the new password (although it might take a few minutes to update across all of the servers). Remember, though, it is imperative that you update your password on mobile devices where you have mail accounts set up, or else you will lock up your account when the device(s) try to use the old password.